Individual lockout/tagout procedures for machine maintenance are well-established and straightforward. But what happens when a group of employees is involved—working across multiple machines, departments, or shifts? The risk of accidental re-energization increases, necessitating enhanced protective measures. To address these complexities, the Occupational Safety and Health Administration (OSHA) mandates greater coordination and communication for group Lockout/Tagout under standard 1910.147(f)(3).
In this guide, we’ll delve into the key aspects of the OSHA standard for group lockout, explore common challenges and share best practices that support an effective group lockout box procedure.
1. Develop A Comprehensive Written Group Lockout Program
Craft a company- and site-specific program that aligns with operational practices and includes essential elements such as:
-
Procedures for outside personnel or contractors
-
Continuity of lockout during shift or personnel changes
-
Emergency procedures for removing lockout devices
-
Clear assignment of responsibilities
OSHA requires annual inspections of written procedures under 1910.147(c)(6)(i). To streamline this, schedule inspections during low-production periods, after kaizen events, or following machinery relocations.
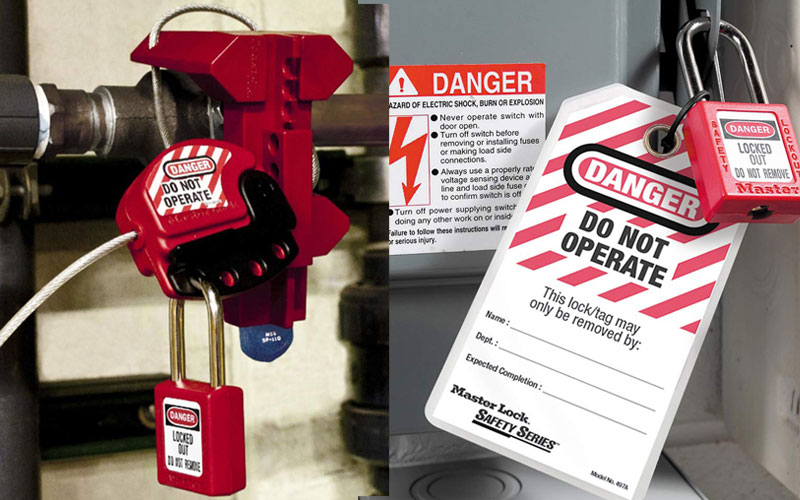
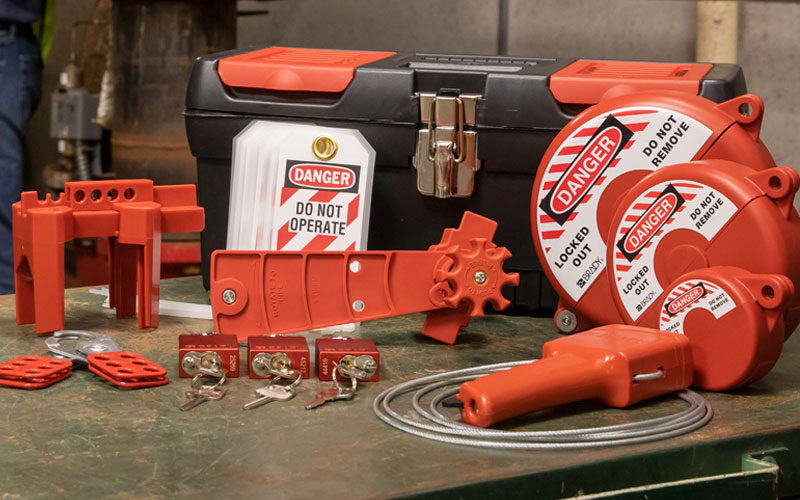
2. Optimize Padlock Use
Use lockout tagout padlocks and tags that are durable, identifiable, and standardized exclusively for hazardous energy control. Key steps include:
-
Color-coding padlocks for departments or contractors
-
Engraving unique serial numbers and employee details
-
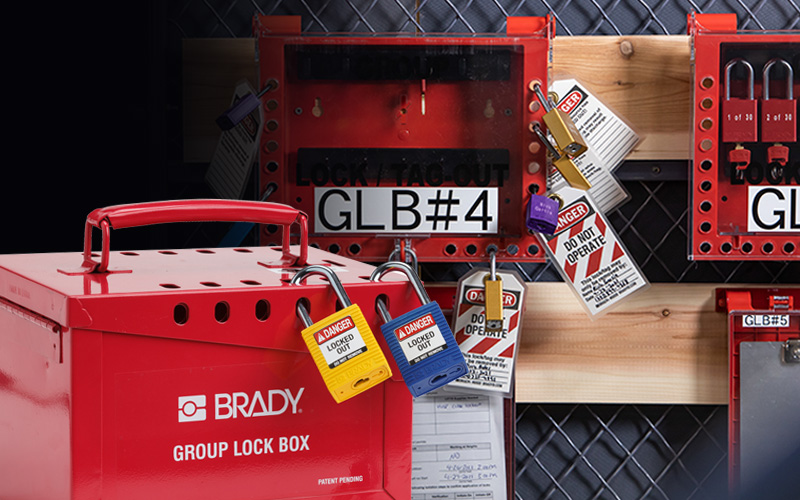
Using group lock boxes for organized storage
-
Deliberate tag usage: opt for reusable laminated tags for employees and disposable tags for contractors
Pro Tip: Color-code lock boxes (e.g., red for employees, yellow for contractors) for clear group identification or utilize a Brady Lockout Tagout Kit.
3. Structure Shutdown And Startup Procedures
Define a clear scope of work before starting, including needs for temporary protective grounds, testing, or specific procedures. Steps to follow:
-
Conduct a job safety analysis (JSA) to identify safety factors, environmental conditions, and physical requirements.
-
Secure necessary permits and approvals.
-
Document the entire shutdown and startup process with clear lockout procedures.
4. Make Critical Information Easily Accessible

Provide employees with quick access to essential lockout resources, such as:
-
Labeled isolation points and group lock box locations
-
Sign-on/sign-off forms
-
Documented lockout procedures, checklists, JSA forms, and permits
Tools to Consider: Brady LINK360 software enables digital lockout procedures, checklists, and barcodes for real-time tracking and compliance. Contact the A&M Industrial Safety Team for more information.
5. Manage Shift Changes Effectively
Maintain consistent communication and organization across shifts with these strategies:
- Use a red primary lock box for authorized employees and a yellow lock box for contractors.
- Label corresponding boxes and accessories for specific equipment lockout.
- Ensure lockout coordinator lock is first on and last off using the primary lock point.
- Assign a shift coordinator to ensure contractor progress is tracked and equipment isn’t re-energized until the work is done.
- Ensure shift coordinator has the master key for contractor locks in case of abandonment (ensure facility’s abandoned lock policy is followed).
- Properly train new staff, especially with turnover of employees with legacy knowledge.
A&M Industrial Safety Services

The A&M Industrial team of safety experts can partner with you to evaluate the safety of your facility and to perform over a dozen services, including Arc Flash Risk Assessment and Logout Tagout. Request a safety service now, or download our safety services listing and brochure for more information.