As a machinist or a workshop owner, you understand the importance of maintaining your tools to ensure optimal performance and longevity. The Kurt Workholding Vise is a workhorse in the machining industry, known for its robust construction and precision clamping capabilities. To keep your Kurt Workholding Vise operating at its best and avoid potential downtime, it's crucial to implement a regular maintenance routine and be prepared to troubleshoot common issues that may arise. In this blog, we will delve into essential Kurt Workholding Vise maintenance tips and common troubleshooting techniques to help you keep your vise in top-notch condition.
Part 1: Kurt Vise Maintenance
Cleaning and Lubrication:
Regular cleaning is fundamental to ensure smooth operation and to prevent debris buildup in the vise's moving parts. Use a soft brush or compressed air to remove chips, dust, and contaminants. Additionally, apply the recommended lubricant to the vise's lead screws and other moving components as per the manufacturer's guidelines. Avoid using excessive lubrication, as it can attract more debris.
Check for Wear and Damage:
Periodically inspect all components of the Kurt Vise for signs of wear, damage, or misalignment. Pay close attention to the vise jaws, handle, and base. If you notice any cracks, chips, or uneven wear on the jaws, it's time to replace them to maintain consistent clamping pressure.
Jaw Alignment:
Proper jaw alignment is crucial for accurate and repeatable clamping. Check the jaw alignment by clamping a piece of precision ground material and measuring its runout using a dial indicator. If you notice significant runout, realign the jaws using the vise's adjustment screws or seek professional assistance.
Screw and Nut Inspection:
The lead screw and nut are critical components that enable smooth operation of the vise. Inspect them for signs of wear or damage. If you notice excessive backlash or uneven movement, consider replacing the lead screw or nut to maintain precision clamping
Regular Maintenance Schedule
It is very important to perform regular maintenance on your Kurt Vise to ensure proper operation. Improper maintenance will result in poor vise performance and may void your warranty.
Kurt Recommended Daily/Weekly Maintenance:
- Remove chips from surface of vise.
- Visually inspect seals for damage and cleanliness.
- Visually inspect for chip entrapments and remove when necessary.
- Air-dry and apply rust inhibiting oil to the machined surface of the vise.
Kurt DX6 Vise Recommended Monthly Maintenance:
- Open the Kurt Workholding Vise to the maximum opening.
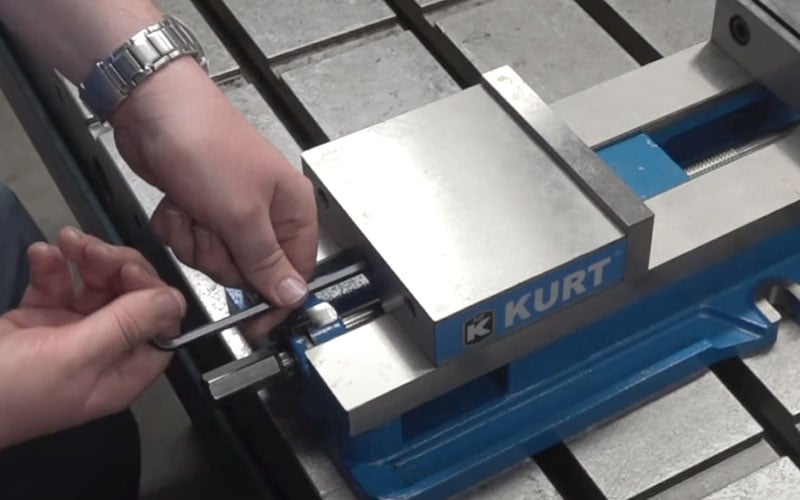
- In the back of the movable jaw (handle end, center hole) loosen the socket head set screw (approx. 6 turns). With the hex key (Allen wrench) in the set-screw socket, lift up and forward to pivot the jaw off of the vise bed.
- Slide the jaw slightly toward the stationary jaw and lift up to remove the jaw from the “beak” of the nut. Note: A spherical segment (shaped as ½ of a steel ball) is inside the cavity of the movable jaw and may fall out as the jaw is removed. Take care not to lose or misplace the spherical segment.
- Turn the movable jaw over and clean the inside cavity. Also clean the spherical segment.
- Remove chips, clean and apply a light coat of machine oil to the machined surface of the nut & screw assembly (clean exposed threads on the screw), bed of vise (top of “rails”), and the inside of the vise between the center ways.
- To re-assemble the movable jaw, apply a “glob” of grease to the under side of the movable jaw in the pocket. Place the spherical segment in the mating pocket and push into the grease. The grease will hold the segment in place when the jaw is turned over to replace.
Kurt DX6 Vise Recommended 3 To 6 Months Maintenance:
- Open DX6 Vise to maximum opening.
- Loosen the set-screw and remove the movable jaw.
- Remove spiral-retaining ring from handle end of the vise screw.
- Remove the screw support from the vise body.
- Remove the two-piece locking collar by removing the four SHCS.
- With one screw still half-way out spin off the first collar.
- Using a pin or screw reach into the second collar and spin it off to expose the bearings.
- Remove the bearing assembly consisting of (2) thrust washers and thrust bearing from the counter bore in the end of the body.
- Clean and inspect the counter bore, thrust washers and thrust bearing.
- Apply water resistant grease to the thrust washer (i.e. marine grade grease)
- Install thrust bearing pack on the screw in the reverse manner.
- Install the first collar by threading the screw until it stops.
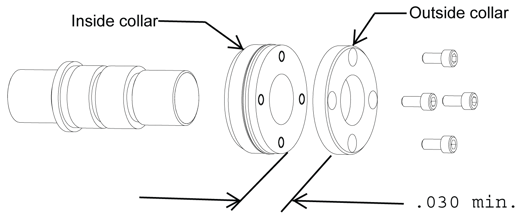
- Install the second collar behind the first and thread on until it stops. At this point the screw holes may or may not be lined up.
- Turn the second collar counterclockwise until a hole lines up.
- Then turn the collar back TWO (2) more screw holes. This will allow proper separation for the collar sections to lock on the threads and keep the bearings firmly in place.
- Install the four SHCS and tighten in a star pattern.
- Install the screw support in the body on the screw (Hex end) and secure using the spiral retaining ring.
Part 2: Troubleshooting Common Issues
Vise Slippage:
If you experience workpiece slippage within the vise, first check if the jaws are clean and free from debris. Next, inspect the clamping pressure and handle for any signs of wear. Adjust the clamping pressure as needed and replace the handle if necessary. If slippage persists, the vise jaws may require replacement.
Uneven Clamping:
Uneven clamping pressure can result from misaligned jaws or damaged lead screws. Perform a thorough inspection of the jaws and realign them if needed. If the issue persists, inspect the lead screws and nuts for wear or damage, and replace them as necessary.
Stiffness, Sticking or Jerky Movement:
Sticky or jerky movement can indicate insufficient lubrication or debris accumulation. Clean the vise thoroughly and apply the recommended lubricant to ensure smooth operation. If the problem persists, inspect the lead screw and nut for any signs of damage or misalignment. If your vise is stiff when clamping on a part or is difficult to backoff a part, the vise's thrust bearing pack may need to be replaced.
Vise will not turn in either direction:
If your vise will not turn, it is jammed with debris. Disassemble and clean as needed.
Vise Turns Hard:
As a new vise the brush seal could be stiff. Allow for break in of vise. As a used vise, it could be filled with chips and threads could be jammed. Properly clean and grease vise.
Summary
The Kurt Vise is an invaluable workholding tool in any machining workshop, and proper maintenance is essential to ensure its longevity and precision performance. Regular cleaning, lubrication, jaw alignment checks, and inspection for wear and damage are crucial aspects of vise maintenance. By following these maintenance tips and troubleshooting techniques, you can address common issues promptly and keep your Kurt Vise operating at its best, allowing you to achieve accurate and repeatable results for years to come. Remember to refer to the manufacturer's guidelines and seek professional assistance when needed for complex maintenance tasks.
Download our exclusive Vise Maintenance Guide
See Kurt Workholding's maintenance recommendations and troubleshooting tips, plus find maintenance schedules that you can follow and keep your vise working at top condition for years to come.